
(Grand)Daddies Home
Having lumbered their way through two large online tournaments, the Wurmspat have maintained a somewhat staggeringly good win-rate despite many nay-sayers nay-saying nay along the way. The warband fighter cards have proved more than a match for the field, especially with enough good universal objectives and gambits existing to patch up the holes left by the Wurmspats below average set of faction specific cards.
I took the putrid plunge with the Wurmspat at the latest 62 player online tournament and managed to go 4-0 on day one, dropping 2 games along the way. My plague ridden pals were halted in the semi-finals however, where I suffered a nail-biting 2-1 defeat at the hands of Benny Monahan and his disgustingly tight Hrothgorn build. Over the moon to have such a successful run I thought I’d write a short article about the deck I played and how it works in case anyone else wants to frustrate their opponents with fighters that refuse to die.
I’ve covered the warband previously in a warband review linked here. I have updated some of the info on there in light of everything I’ve learned playing this deck. This article will mainly focus on the cards I chose and how to play this version of Wurmspat, for a more general overview of the warband have a peek over at the review!
Without further ado, here are the Firmspat!
(also check out Mikes tournament deck if big bois do it for you)
Being Passive-Aggressive

I had a crucial goal when making this deck and gradually honing it, which was to have an objective deck which scored off as little killing as possible. The reason for this is that the Wurmspat (and in particular Sepsimus) do their best killing after they have inspired and have some upgrades. You want to fight when you are nice and powered up, so your glory has to be reliable and preferably be scorable before the scrum starts.
This doesn’t mean you cant start fighting from activation 1, it just means you don’t have to!
After you’re kitted out and powering through your objective deck you can stick Tome of Offerings onto Sepsimus and Cryptic Companion onto Fecula and continue to churn out glory even with a deck that may initially seem quite low scoring.
This deck wants to be aggressive, it just wants to do it passively…
Hit things if you can but if you don’t its chill we still winning.
To explain this properly I’m going to cover board setup first. Its worth remembering that The Wurmspats game tends to be separated into Pre-Inspire and Post-inspire. Essentially you inspire first and infect fools afterwards. Anyway with that said lets look at the boards and how that affects our gameplan.
Love your Garden, Nurgle-Style!

Choosing boards, placing objectives and finally placing lethals is crucial for every warband, but the Wurmspat have a few tricks that make these placements especially important. “What are our priorities for setting up the perfect garden?” I hear Titchmarsh cry. Well…
- Give yourself the option of deploying close to the enemy (what if Strong Start or Swift Capture is in your opening hand?)
- Make sure you have a lethal hex that can score you Calculated Risk (you might have to place this lethal hex yourself, as some good Nurgle boards don’t come pre-packaged with them)
- Make sure you place an easy Swift Capture Objective – yes even into Grymwatch and Thorns (we’ll talk more about this later)
- Set up objectives in good Faneway positions
- Place your lethal hex next to spawn hexes or objectives that aren’t on edge hexes. You need to be able to threaten ping damage across the enemy board.
These are general considerations into any matchup. Lets have a look at some specific board setups for certain matchups.
Come at me bro: The Aggro Match-up
Setting up the board into aggro is all about controlling the flow of enemy fighters into your mucusy meat grinder. It’s long board time, but not necessarily to hide…

When facing aggro players the Wurmspat can really leverage their damage reduction mechanic to their advantage. Surge objectives dependant on kills become much harder to score when a stray block roll can deny the card. Nevertheless, aggressive opponents will come with a deck tooled to fight and there is no reason to make that easy for them.
A spread out Nurgle warband can be easily picked off, so stay together if you can. Equally Fecula and her causeous crew want the enemy to charge at them so they can take full advantage of their range for multiple attacks. Force the opponent to come at you one at a time, or else wait for your deliberate advance. You either fight gradually as the enemy comes to you, or focus on scoring and inspiring before advancing into the enemy. By that time you will have two block dice and some of the most powerful fighter cards in the game. Narrow boards prevent the enemy from using speed to run past your bash bro’s. The enemy comes through you or not at all.
Ghulgoch is a powerful model, but as he scores no specific objectives and his name isn’t Sepsimus he is the fighter we miss the least. Its also worth being aware that some cheeky Underworlds players run Victorious Duel (those dasterdly trolls – mike), so being too cavalier with Fecula’s life can be punished.
Focus on pinging damage onto the opponent with pushes into lethal hexes and your ping damage gambits to inspire ASAP. Do your best not to overextend to early and get picked off. If you have to score Swift Capture or Bold Conquest, time the moves appropriately – probably toward the end of the turn UNLESS you get a god hand and can inspire early.
Faneway is you friend, it helps with Swift Capture, Spread His Blessings and Bold Conquest. It can also teleport Sepsimus to the backline after the real enemy threats have committed to your board, but be careful if you do this. When facing aggro the mantra really is stick together, get inspired and move forward slowly.
Denied: The Objective Match-up
Defeating objective decks is all about disrupting them with pushes and ping damage whilst you close the gap. These matchups tend to be much easier to inspire in, and after you inspire most objective warbands will find it near impossible to bring a fighter down. This gives you a little more freedom to be aggressive.
Once you are inspired and in amongst the opposition with Sepsimus, it can be a huge uphill battle for an objective player to get anything they want.

As usual, give yourself a Swift Capture Objective. If you’ve won boards the opponent will already have three objectives. Four is a bonus for an objective band, but an easy enemy objective to run onto is a bigger bonus for the Wurmspat. Threaten the safer spawn hexes with lethals and make sure you have Fecula in position to score Calculated Risk.
Ghulgoch is your opening charge. Three smash into what are predominantly 1 dodge warbands is a very reliable kill, glory and step toward inspiring. Start covering off enemy objectives ASAP and prioritise the chaff that want to score your opponents objectives. Always use push cards to deny opponents at the last second, when they have invested the most activation’s/power cards.
An inspired Sepsimus with Tome of Offerings, Unstoppable Tread and Virulent Blade feels like a win condition on its own in these match-ups. He can surf around enemy hordes denying objectives and farming glory. Be careful with Sudden Growth, as an early equip can allow an opponent to create distance between them and your most threatening fighters. Where possible always charge onto objectives, or hop onto them with Unstoppable Tread after a kill.

When your opponent gets to setup boards and offsets you, you want to place your Swift Capture objective last in the corner. If you think your opponent is wise to this strategy, place the objective early one hex to the right. This important thing is to place it over 2 hexes away from a spawn hex, so your opponent cant Varclav push or Pack Advance immediately onto it. Cover this objective ASAP, preferably with Ghulgoch, and watch as a melee ensues as the middle objective becomes the focus of the fight.
Try not to place objectives at the back of the board. A stray crypt ghoul can resurrect onto these and force you to divide your forces, or a Chainrasp can Sudden Appearance back there. You want the opponents only option to be to fight in the tight corridor with your tanky fighters.
Just be wary with your lethal hexes, you don’t want to be denied Calculated Risk because you have no lethal hexes in your territory. Use your judgement to find the safest place to put it.
Control plays similarly to the objective match-up (and therefore doesn’t get its own section, I’m too lazy). Prioritise Faneway and Spectral Wings and focus on scoring your glory. Your deck will allow you to ping damage for inspiration, and Fecula’s range is another option to chip at a defensively positioned warband. Control focuses on denying your glory, and provided you have chucked a few objectives in enemy territory you will be difficult to deny. Against Tome decks I’ve learned the hard way (Thanks Benny) to lean heavily on Tome of Offerings and Cryptic Companion, those cards can be worth just as much as the Tome bearer if you play it right. The glory ceiling of this deck can (and did) match Tome decks even if the bearer survives the game.
Spread His Blessings: Scoring on the move
Next up, I’m going to go through the Objective Deck in sections and look at the types of cards we’re trying to score and how to score them. I’ll look at related Power Cards that help to score these Objectives as well.
First up, the draw card cards.
Drawing draw card cards


Digging Deep: Probably my least favourite card in the deck, but still a solid end phase scorer. The most common interpretation of this card dictates that once you have drawn a total of 4 cards from either deck you have met the conditions required to score it. If that changes in an FAQ to require 4 cards from a single deck then this card is in the proverbial bin.
Normally you’ll hope to combo this card with Unnatural Truce, Frenzied Search and a couple of scored surge objectives (as these automatically allow you to draw new cards from the Objective Deck). Activations can then be spent to “top up” your draw total. Ideally I don’t like spending more than one activation drawing cards, but sometimes you may have to.
Frantic Exchange: I love this card and the effect it has on your opponent. As soon as the opponent starts ramping up a combo in the power step, bang on a few upgrades and score yourself this beauty. It also combos beautifully with your draw gambits! Playing well with this card is all about waiting for the perfect moment to spend your power cards, so you time your power play with your opponents. A weakness of this card is it can force suboptimal use of cards to reach the 5 power card total, but all in all any card you can score in the power step by yourself is a good one. Especially if its a surge.
To the End: There is never a game I don’t burn through my deck by the end, so this card may as well read score 2 glory in the third end phase. Some games you’ll even score this in the second. A card that rewards you for getting through your entire deck (and thus exerting every bit of power you have in that deck) is a worthy addition. It’s also a card your opponent has no way of blocking.


Dabbling in Objective Play


With only 3 fighters in a warband that wants to be moving predominantly towards the enemy, you have to be careful with objective play. You don’t want to commit to holding too much with only 3 fighters, as every action you take is crucial and any disruption of your objective holding plans is more devastating than it would be for a warband with 7 fighters they can activate.
Swift Capture: Swift Capture is as greedy as we get, if you can hold two objectives at the end of an activation then take yourself a tasty glory. Players attempting to avoid confrontation with your models will cede this glory to you without much interference (outside of gambits). Against more aggressive opponents you have to time your foray into enemy territory so as not to leave yourself open for a counterattack. This card primarily serves the purpose of being a Surge you can score without rolling dice on the way to your opponent.
Bold Conquest: Probably my least favourite surge currently, as it relies on commiting Fecula. This means that instead of using Fecula as a somewhat expendable ping damage agent to help inspire, you have to hold her back in order to score this card when you draw it. Still this is another Surge that doesn’t need dice to score. Just good positioning and a well timed draw.
Spread His Blessings: You want to be in enemy territory and you want to be blocking their objectives, so it makes sense to try and score off of this too. Spread His Blessings is another reason to make sure you deploy accessible objectives in enemy territory during board setup.
Restless Prize, Faneway Crystal, Spectral Wings and Steady advance are the cards that will help you score these cards. Mobility makes sure no objective is out of your reach and the pushes will plant your fighter firmly on objectives when the opponent attempts to budge them off.
A quick tip for Restless Prize (and Mischievous Spirits if you run it), always move objectives to edge hexes if you can. Better to bait fighters into a tasty Collapse.


Less Passive, More Aggressive


Our two objectives that rely on dealing disease-ridden death are as flexible as they can be. Neither require a fighters attack action to deal the finishing blow, gambits and lethal hexes are equally useful for both cards. Even an enemy fighter killing themselves on a lethal hex in their activation could score you either card.
Strong Start: A great surge to start a round with but an absolute pain to draw into, this card can only be scored if you have it in hand when the first fighter falls AND that fighter is an enemy fighter. Some games Ghulgoch will net you 2 glory with an early charge into a ghoul, other games this card will be a pain to score. The advantage of this card for Nurgle in particular is that your fighters are reasonably sturdy, so usually the first fighter to be taken out of action in any given round will be an enemy one.
Unexpected Pitfall: Always, ALWAYS, drop either Encroaching Shadow or Collapse onto a 2 wound fighter on an edge hex if you have that option. That way when you draw into the second card you can proc this objective easily. The last thing you want to be doing is faffing around trying to distract people into lethal hexes because you dropped your ping damage on a fighter you now mathematically can’t kill with a gambit. This card supports how your deck wants to play, you just have to be aware of it’s existence in your deck even when you don’t have it in hand. Do not burn all of your ping damage gambits before you draw into this.


Welcome to the Glory Farm


Glory doesn’t just have to come from your objective deck! These cards help you farm up throughout the game and pad your glory totals.
Cryptic Companion: Has Fecula scored you Bold Conquest and Calculated Risk? Bang her on an objective and wring even more glory out of the warty wench. Any gambit you force an opponent to spend keeping Fecula off of an objective is a gambit they aren’t spending keeping Sepsimus out of their soon to be impaled face.
Tome of Offerings: Speaking of Sepsimus, just keep banging upgrades on him and top him off with Tome. Eventually (as you always burn through your whole deck) Sepsimus will be dealing 4 damage at 2 range with a re-roll. He will slide after every activation. He will have extra wounds, 2 block and reduce damage on rolling those blocks. He will score 2 glory for every kill.
The prolapse is king.
The scything attack is for style points.


Filling in the gaps (of the deck, not Ghulgoch’s belly)


There’s not a huge amount to say about the remaining cards. Calculated Risk and Combination Strike are old staples.
Great Gains is a card you could replace Combination Strike with depending on how much you like to gamble on drawing your surges at the right time. Personally I’m not a huge fan of either card but there aren’t a lot of end phase options currently.
Team Effort: Team Effort is a great end phase card for the Wurmspat in particular as you normally want to have every fighter activated once every round, so you rarely have to go out of your way to score this. Some games 2 fighters will drop and Team Effort will become impossible, but those games are few and far between.
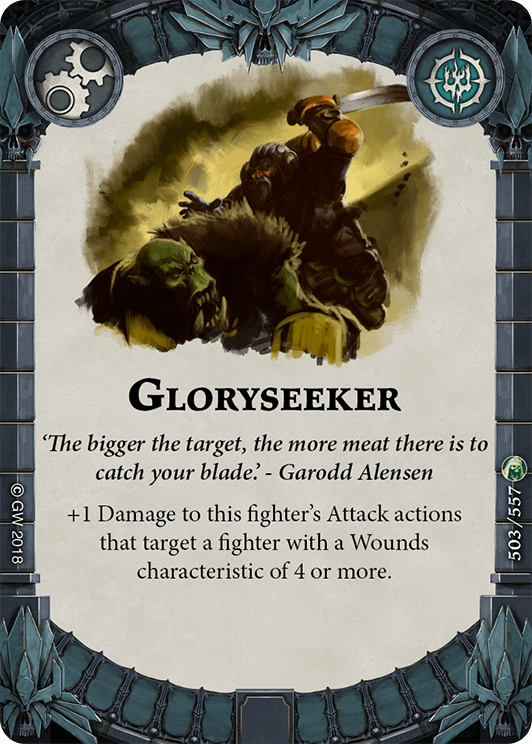
The deck is rounded out with a bit more health, damage and accuracy to cement the threat your fighters have. Gloryseeker helps Fecula become a bit more dangerous at range, and Potion of Rage helps stack the dice for those all important attack actions. Sudden Growth usually serves as a panic button for when a fighter comes close to death, rather than a pro-active tanky upgrade. You want to be equipping Sudden Growth as soon as a fighter is in kill range, and be mindful of the fact that your new big boi is very easy to run away from.


Fetid Fun-times await!
There we have it! Hopefully that run down is useful for playing this deck and Wurmspat in general. I’m very excited for more cards, because there are definitely some in the deck currently that feel a bit like the best of a bad bunch.
Nurgle have a lot of options when it comes to deck-building, and maybe some even more aggressive builds are on the horizon. Maybe magic will make an appearance, or a hard control build will become popular. Currently I do think a more flexible build which at its core is aggressive is the way to go.
Do let me know if anyone has any other cards they think would be useful additions. Cards such as Blaze a Trail have already been highlighted to me as potential options, and I am sure more lie waiting! Until then though…
Nurgle’s Garden Grows
Tom

Hi Tom,
nice write-up and congratz on going 4-0 on day one of the tournament.
I was wondering how you think about fired up and faithful reward in this deck? Since your goal is to inspire asap anyway these two very similar (in this warband basically the same thing apart from maddening cackle and the like) end phase objectives should be easily scorable on the go.
I’ve been dabbling with a perfect match build with 11 hopefully very easily scorable 1 GP objectives. It works wonders in horde and flex match ups but can brick horribly in aggro match ups like Rippa/CB/farstriders etc.
How do you feel about perfect match for the Wurmspat?
Greetings
Schmuvness
LikeLike
Hi Schmuvness
I actually ran both in a version of this deck, and I think they definitely have a place as reliable end phase scorers. I would consider Fired up instead of Digging Deep. The only issue with these cards is in match-ups where your opponents is running a smaller warband and is wise to your edge hex related damage tricks it can be very difficult to inspire. In those match ups these cards can brick in your hand.
Having said that they are both greath cards and as you say they synergise well with the Wurmspats primary objective. You could argue if you don’t inspire you’re on to a loss anyway. My ethos is to be careful with cards that are difficult to score on turn one though, and these cards can come under that heading.
If you want these cards maybe try and fit in Sphere of Aqshy too!
Perfect Match is interesting. Its a big end phase scorer, but if your opponent is wise to your objective deck they can focus on pushing you off of objectives in their territory. Equally with Hrothgorn being so prevalent he can just destroy those objectives, denying cards like Swift Capture and Spread His Blessings. Unexpected Pitfall an also sometimes be a stumbling block.
It’s definitely worth practising with though, to see if you can make it work!
Cheers
Tom
LikeLike
Hi Tom,
thank you for your comprehesnive answer. I have another question:
How do you handle the big troll? i guess from practising alot with Mike you’re the expert on that topic. Do you still deploy like vs aggro? Do you whittle him down or do you go for the little guys in the back by setting up boards wide?
Also in a more general way, which boards do you choose when you have to put down the boards first against all kinds of opponents? In the article you just described one scenario vs. objective warbands.
Looking foward to your reply.
Schmuv
LikeLike
So that partciular board is one i use if i think the opponent is going to offset me. If i think my opponent is aggro, any board with a lethal hex on is good. It makes scoring calculated risk easier and frees you up to place a lethal in enemy territory. I dont do this against an opponent that might offset me as they can often take advantage of the lethal hexes on your board toput you at a disadvantage.
Going against the troll is hard because inspiring is hard. Honestly deploy back and save your push cards to move the squigs onto edge hexes. Once you inspire the matchup is absolutely fine, but the fact its so difficult to inspire puts you at a disadvantage early. Ping the squigs and hit Mollog towards the end of the turn. Hit him for 2 damage first and then combo him down.
With 2 block its easier to go toe to toe with the troll, as he struggles to hit you and even then you reduce damage.
LikeLike
Hi Tom, did you see the new BAR? What do you think about the Wurmspat after the new restrictions?
LikeLike
Heyyy
have a quick look at Mikes article – the top tournament decks toppled one. I wrote about a couple of changes I would make to the deck in that!
I may well update this article to reflect the new FAR, I’ll keep you posted bro. Long story short for the deck is you need Frenzied Search, I think Sudden Growth has to go.
LikeLike